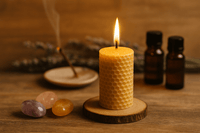

How to Make Gel Candles Safely
Gel candles look magical when they catch the light. Clear, glossy, and easy to dress up with shells, glitter-safe embeds, or layered color, they can turn a simple room into a whole mood. But gel is not the same as soy, beeswax, or paraffin, and if you treat it like regular candle wax, you can run into real safety issues fast.
If you want beautiful results without the stress, the safest approach is simple: use the right gel, the right glass, the right wick, and keep the design cleaner than you think you need to. A gel candle should feel calming when it burns, not like an experiment you are nervous to light.
How to make gel candles safely from the start
The first safety choice happens before you melt anything. Candle gel is a mineral-oil-based product thickened with polymer resin, and it burns differently from traditional wax. That means your container, wick, fragrance load, and decorations all matter more than most beginners expect.
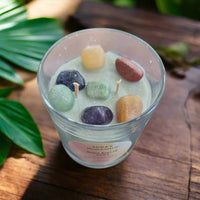
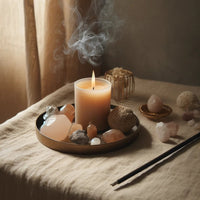
Start with a heat-safe glass container made specifically for candles or for high-heat use. Thin decorative glass, vintage drinkware, and random jars from the kitchen may look nice, but they are risky. Gel is transparent, so people often choose delicate glass to show it off. That is exactly where problems begin. If the glass is not rated for heat, cracking is always on the table.
Your wick also needs to match the density of the gel. Low-density gel, medium-density gel, and high-density gel do not burn the same way. A wick that is too small tunnels and struggles. A wick that is too large can overheat the container and burn too aggressively. If you are making candles to gift, sell, or use in ritual spaces, testing is not optional.
Fragrance is another place where safe crafting beats guesswork. Not every fragrance oil works in gel candles. Some oils are too polar and can cloud the gel or create instability. You need fragrance specifically approved for gel candle use. If the supplier does not clearly say it is gel compatible, skip it.
What you need before you begin
A safe setup is not complicated, but it should be intentional. You need candle gel, pre-tabbed wicks or gel-compatible wicks, heat-safe glass containers, a double boiler or controlled melting pot, a thermometer, and gel-safe fragrance if you want scent. You may also want liquid candle dye made for gel, wick stickers, and a metal tool or chopstick for positioning the wick.
Keep your workspace clean and calm. No loose paper near the heat source, no rushing, no distractions, and no kids or pets underfoot while you are pouring. Gel gets hot, and unlike creamy waxes that hide mistakes, clear gel shows everything, including trapped bubbles, debris, and poor embed choices.
If you want decorative pieces inside the candle, be selective. Non-flammable embeds are the safer route, but even then, placement matters. Keep decorations far from the wick path. Dried flowers, paper, plastic trinkets, and anything porous or flammable should stay out of gel candles entirely. They may look dreamy in photos, but they are not worth the burn risk.
Safe melting temperatures matter
If you are learning how to make gel candles safely, temperature control is the part to take seriously every single time. Gel should be melted slowly and monitored with a thermometer. Do not heat it directly over open flame or blast it on high heat just to save time.
Most gel candle makers work within the manufacturer’s recommended melt range, often around 200°F to 230°F, depending on the formula. Always follow the instructions for your specific gel. Going hotter than necessary can scorch the gel, create more bubbles, and increase risk. That also affects clarity, which defeats the point of using gel in the first place.
A double boiler setup is usually the safer choice for beginners because it softens the heat. Stir gently if needed, but do not whip air into the gel. If you want crystal-clear candles, patience pays off.
Add fragrance and dye only at the temperature recommended by your supplier. Dumping additives into overheated gel is a fast way to create cloudiness or an unstable candle. Less is often better. With gel, overloading scent can affect burn quality, and a beautiful candle that burns poorly is not a win.
Choosing the right container and wick
Glass is standard for gel candles because the whole visual appeal depends on transparency, but not all glass performs equally. A thick, straight-sided container is usually easier to test and safer to burn than a novelty shape with curves, seams, or a narrow opening. Containers that pinch at the top can trap heat, which changes how the candle burns.
Wick choice depends on gel density, container diameter, and fragrance load. There is no universal wick that works for every gel candle. A small clear candle in a slim jar needs a very different wick than a wide vessel with color and fragrance added. This is where many makers get frustrated, because the candle can look perfect on day one and still fail the burn test later.
That is normal. Gel candles often need more testing than plant-wax candles because transparency makes design tempting, while the burn still has to stay controlled. If the flame gets too tall, soots, or creates excessive heat, size down or switch wick style. If it drowns or tunnels, adjust upward carefully.
Decorating without creating a hazard
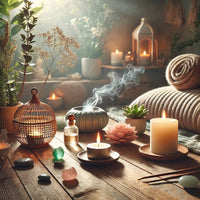
This is where people get carried away. Because gel is clear, it invites creativity. Seashell themes, crystal-inspired colors, floating glitter effects, beach scenes, zodiac looks - all of that can be gorgeous. But safe design is restrained design.
Keep anything decorative away from the wick line and lower half of the melt path. Even items that seem harmless can shift the flame, create hot spots, or interfere with an even melt pool. If your decoration makes the candle harder to burn safely, it is not a good decoration.
Color should also stay light if clarity matters. Too much dye can muddy the candle and change how it performs. The best gel candles usually look intentional, not overcrowded. A clear base, a clean wick, and one focused design idea often beat a container packed with extras.
Pouring and cooling the safe way
Once the gel is fully melted and your fragrance and dye are incorporated, pour slowly into a prepared container with the wick centered and secured. A slow pour helps reduce bubbles. Some bubbles are part of the handmade look, and some customers love them, but too many can distract from the finish.
Warm containers can also help reduce sudden temperature shock and minimize trapped air. You do not need them hot, just not ice-cold. After pouring, leave the candle alone to cool at room temperature. Do not move it around, refrigerate it, or place it in a drafty spot to speed things up.
Trim the wick once the candle is fully set. Before gifting or selling, do a full burn test. Let the candle burn long enough to show you the real melt pool behavior, flame height, and container heat. If the outside of the glass gets too hot to comfortably touch, that candle needs adjustment before anyone lights it at home.
Common mistakes that make gel candles less safe
The biggest mistake is using random fragrance oils because they smell good in the bottle. Gel compatibility matters. The second is treating decorative embeds like harmless styling props. If it can burn, melt unpredictably, or move into the flame path, it should not be in the candle.
The third mistake is skipping testing because the candle looks finished. Looks are not performance. A clean top, pretty color, and centered wick tell you almost nothing about how the candle behaves after two or three hours of burn time.
Another issue is poor container choice. A glamorous glass vessel can absolutely be the wrong vessel. Safety is not the place to improvise with fragile containers, especially if the candle is meant for gifting.
How to make gel candles safely if you want to gift or sell them
If your candles are for friends, events, or customers, your standards need to go up. Add a warning label, include burn instructions, and test each formula combination, not just one version. Changing the scent, dye level, wick, or container can change performance.
This is especially true for gift candles. People may burn them in bedrooms, bathrooms, meditation corners, or near decor. They may not understand the difference between gel and wax. Clear guidance matters.
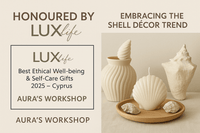
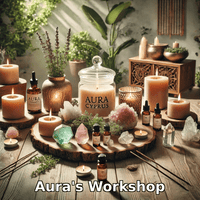
If you are building a handmade candle lineup, it helps to source supplies from a specialist that understands both aesthetics and performance. At Auras Workshop, that maker-meets-retail mindset is part of the appeal - beautiful products are great, but they still need to work safely in real homes.
Gel candles can be stunning, giftable, and surprisingly beginner-friendly when you respect the process. Keep the design clean, follow temperature guidance, test more than once, and let safety be part of the ritual, not an afterthought.